A well-organized Table of Contents (TOC) is essential for navigating lengthy or complex documents. It provides a quick overview and allows readers to jump to specific sections.
Google Docs offers a built-in option to insert Table of Contents (TOC) that includes all headings, but you can customize it to show only specific levels for a cleaner overview.
In this tutorial, I’ll show you how to insert a Table of Contents and customize it to include only specific heading levels.
Inserting the Table of Contents in Google Docs
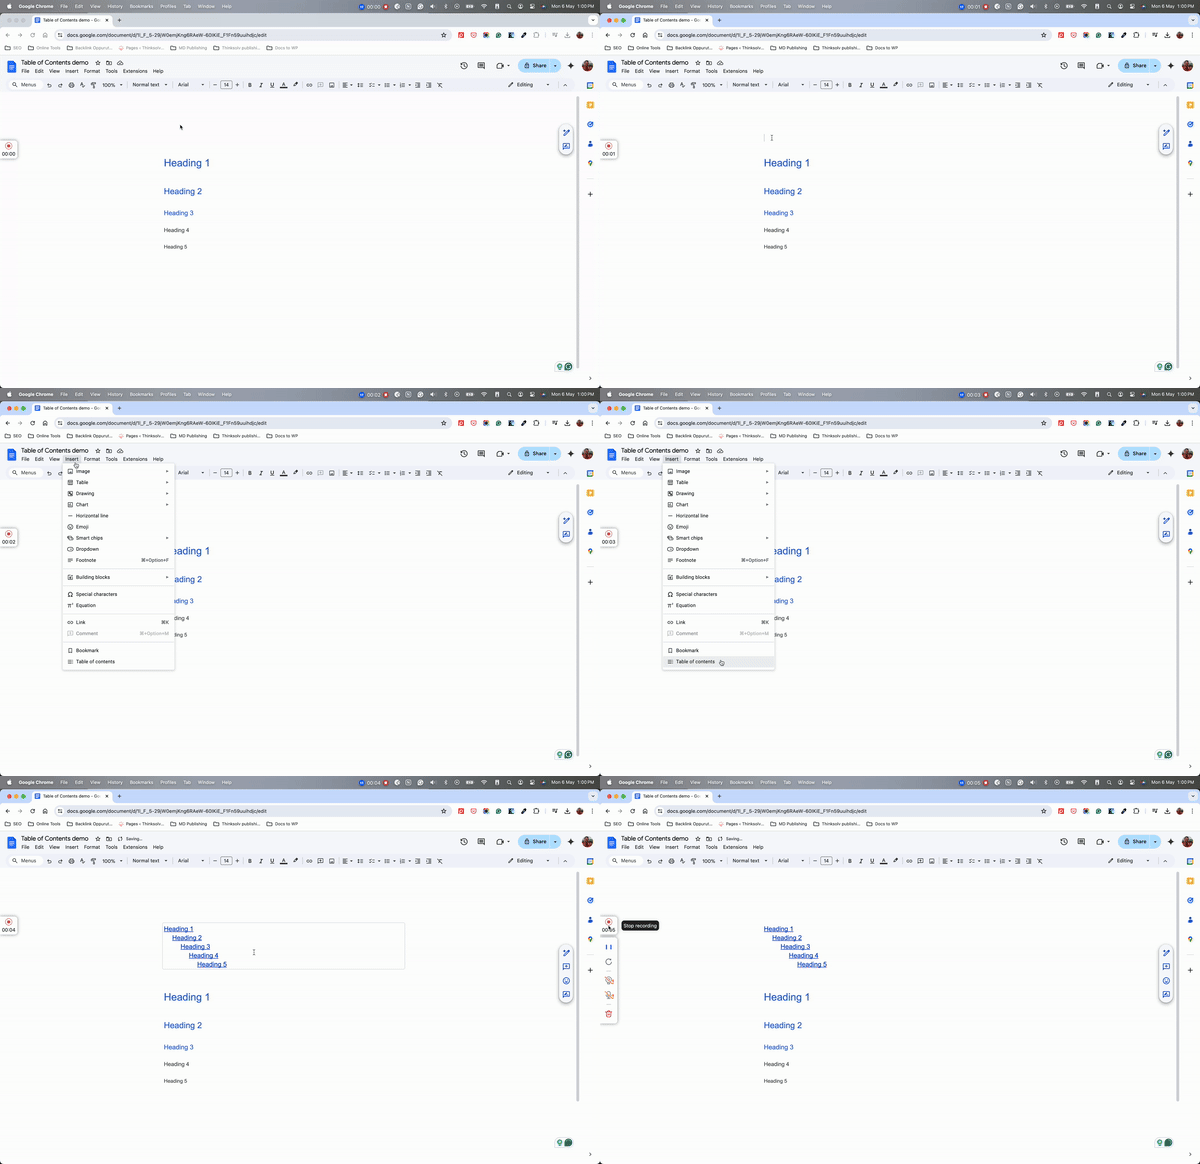
To insert the Table of Contents(TOC) in Google Docs, Select the Insert Menu and click the Table of Contents option.
Detailed Steps:
-
Place the cursor at the desired location where you want the table of contents to be inserted
-
Click on the Insert menu
-
Select Table of Contents option available at the end of the Menu.
The table of contents will be inserted with all the headings available in the document.

Updating Table of Contents with New Subheadings
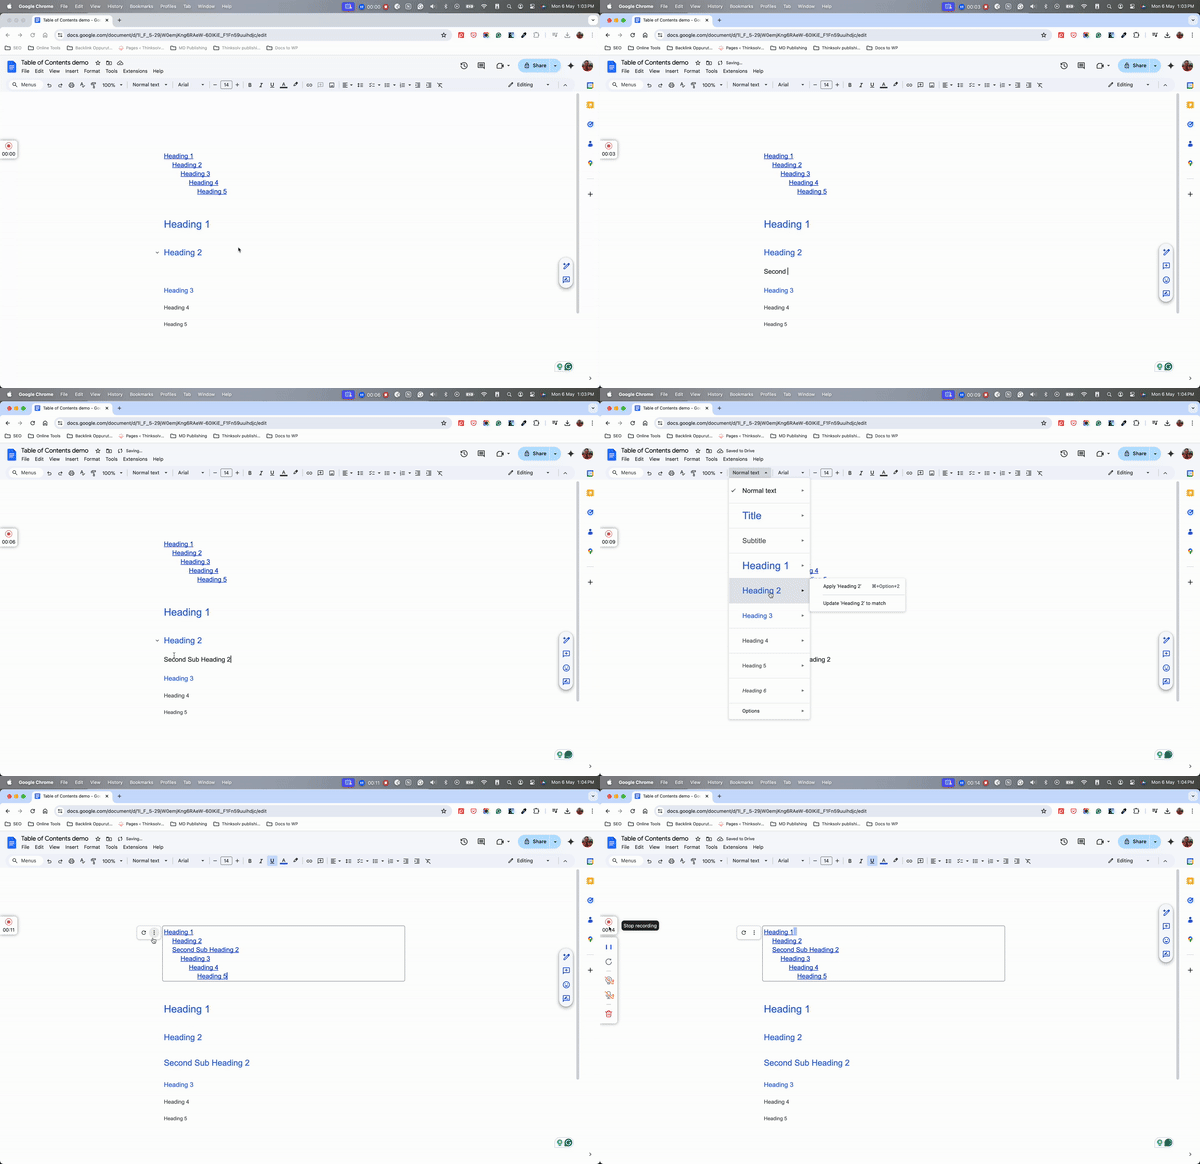
When you insert a new heading into your Google Docs, it will not be added to the TOC automatically.
To add the new headings to the Table of Contents, you need to refresh it using the Update table of contents option as shown in the following animation.

It is always a best practice to insert a Table of Contents when you are done with creating your document and it is ready to share with others or publish elsewhere. This way, there is no need to refresh the table of contents each time when you add a new subheading.
Customizing the Table of Contents to Include Only Specific Heading Levels
When your document uses many subheading levels (H2, H3, H4, etc.), including all of them in the Table of Contents (TOC) can make it cluttered and difficult to read. To provide a cleaner overview, you can customize the TOC to include only specific heading levels, such as H2 and H3.
Here’s how to customize the Table of Contents to include specific heading levels:
-
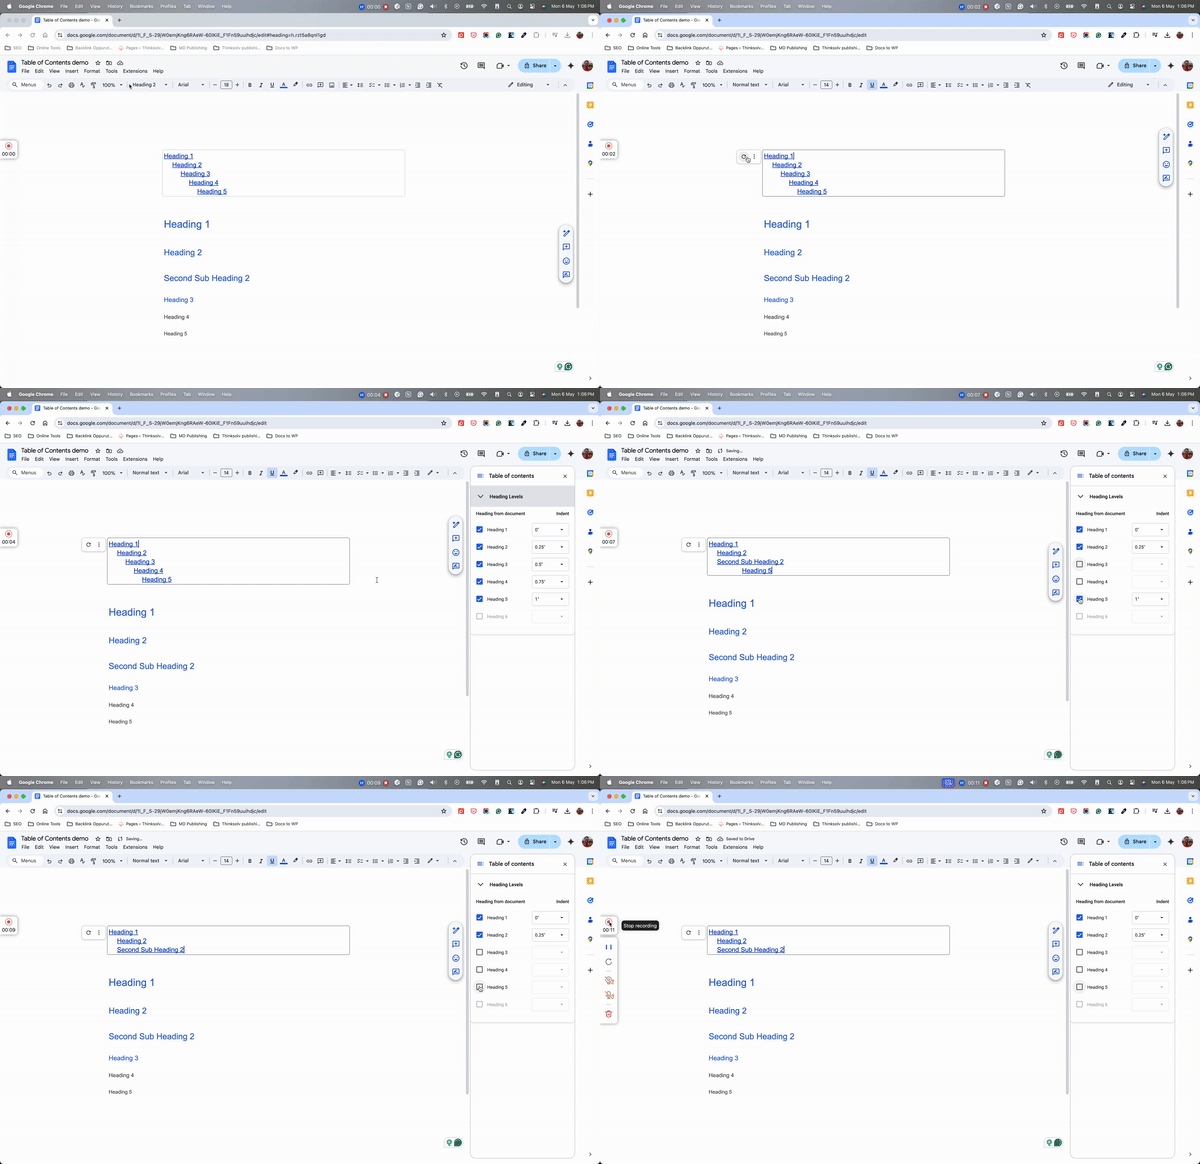
Select the Table of Contents by Clicking on the TOC itself.
-
Locate the three dots menu and click on it to reveal “More options”
-
A sidebar titled “Table of contents” will appear. Check the boxes for the desired heading levels (H2 and H3 in this example) and uncheck the boxes for any levels you want to exclude.
-
With these changes, only the chosen heading levels will be displayed in the TOC, providing a clearer structure for your readers.

Exporting the Google Docs with the Table of Contents
When exporting your Google Doc (e.g., to Markdown or PDF), the built-in Table of Contents (TOC) usually gets included. This means readers can still navigate using the TOC in the exported file.
When you convert Google Docs to PDF format, the exported PDF will usually have a working TOC for easy navigation. However, when you need to export Google Docs to Markdown, the add-on Docs to Markdown Pro can help you create a TOC with the HTML headings and anchor tags in the headings. This will help you publish the Markdown directly with the working TOC for easier navigation.
Best Practices for Adding Sub Headings in your Docs
-
Keep your heading labels short and descriptive, accurately reflecting the content of the following section.
-
Use consistent formatting and language for headings throughout your document.
-
Maintain a clear heading hierarchy (e.g., H1 for main sections, H2 for sub-sections, etc.) for a well-organized structure.
-
When appropriate, consider including relevant keywords in your headings for improved searchability within the document.
Conclusion
By incorporating a well-structured Table of Contents and following best practices for headings, you can significantly enhance the readability and usability of your Google Docs, especially for lengthy or complex documents. This not only improves the experience for your readers but also allows them to navigate your content efficiently.
